


How to Set Pergola Footings Below the Frost Line (Step-by-Step)

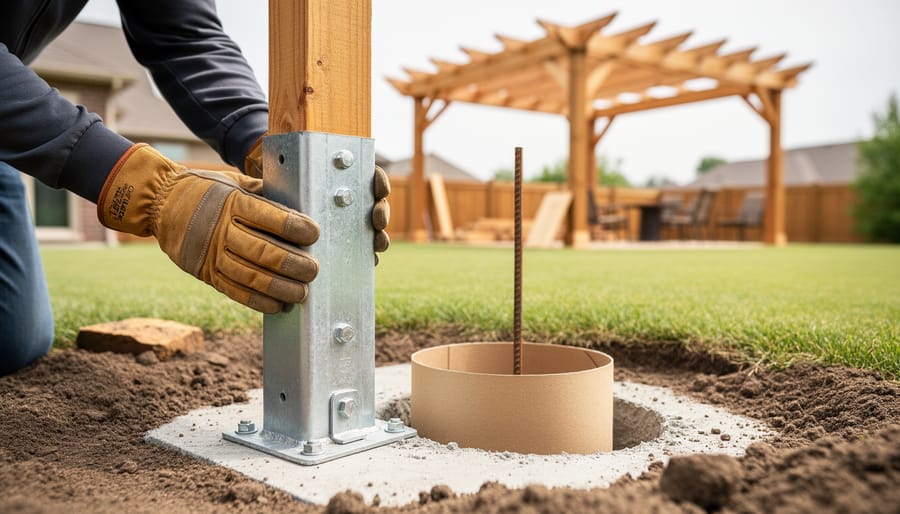
Pergola footings must extend at least 6 inches below your local frost line to prevent frost heave from cracking concrete and destabilizing your structure. For most of the United States, that means digging between 12 and 48 inches deep depending on your climate zone. In southern states like Texas and Florida, frost lines sit around 6 to 12 inches below grade, while northern regions such as Minnesota and North Dakota require footings 42 inches deep or more.
Key Takeaway: Check your local building code for exact frost line depth in your area, then add 6 inches. Northern climates typically require 36-48 inch footings, while southern zones need 12-18 inches.
Understanding frost lines isn’t just building code trivia. When water in soil freezes, it expands with tremendous force, pushing upward against anything in its path. Shallow footings placed above the frost line get shoved out of position every winter, causing posts to lean, beams to crack, and your entire pergola to shift off level. One homeowner in Michigan learned this the hard way when his 10×12 pergola tilted three inches after the first winter because he stopped digging at 24 inches in a zone requiring 42-inch footings.
The good news is that proper footing depth is straightforward once you know your number. Most pergola projects take one weekend to complete the footing work, even for a four-post structure. You’ll dig holes, set cardboard tube forms, pour concrete, and install post anchors or embed pressure-treated posts directly. The process requires basic tools and patience, but getting the depth right from the start saves you from expensive repairs or complete rebuilds down the road.
This guide walks you through calculating your exact footing depth, gathering the right materials, and executing each step safely so your pergola stays level and secure for decades.
Understanding Frost Lines and Why They Matter for Pergolas
How to Find Your Local Frost Line Depth
Finding your local frost line depth isn’t guesswork, it’s a quick research task that can save you from costly structural problems down the road. The frost line varies dramatically across the country, from essentially zero in southern Florida and coastal California to 60 inches or more in Minnesota, North Dakota, and other northern states. Your first stop should be your local building department, which maintains specific frost depth requirements for your area and can tell you exactly how deep your pergola footings need to go. Many municipalities require permits for permanent structures, so you’ll need to contact them anyway.
If you prefer to do preliminary research before making that call, several reliable resources can point you in the right direction:
- Your local building department’s website or office
- Frost depth measurements from government sources and regional maps
- State construction codes, which often publish frost line tables by county
- Experienced local contractors who install decks, fences, or outdoor structures
Keep in mind that frost lines can vary within a single state or even a county, depending on elevation and microclimate. A town in the mountains might have a 48-inch frost line while a valley community 20 miles away requires only 36 inches. Never rely on what worked for a friend in another zip code or a generic internet chart. Get the official number for your specific location, confirm it with your building department, and dig to that depth plus six inches for good measure.
Tools and Materials You’ll Need
Gathering the right tools and materials before you start digging saves trips to the hardware store and keeps your project moving smoothly. Some items are essential for every footing installation, while others depend on your soil type, the number of posts, and whether you’re working alone or with help.
Essential Tools and Materials:
- Post hole digger (manual clamshell-style) or power auger, manual diggers work well for 2-4 holes in average soil; rent a one-person or two-person auger for more than four holes or hard, rocky ground
- Measuring tape (25-foot minimum), for marking footing depth and checking post spacing
- 4-foot level, critical for keeping posts perfectly vertical while concrete sets
- Concrete mix, plan on two to three 80-pound bags per footing for a typical 12-inch diameter hole at frost-line depth
- Gravel (pea gravel or crushed stone), 4 to 6 inches per hole for drainage at the bottom of each footing
- Sonotube forms (optional), cardboard tubes that create clean, round footings and prevent soil from mixing with wet concrete; especially useful in loose or sandy soil
- Post anchors or brackets, galvanized or stainless steel hardware that sits in the concrete and holds the post above ground moisture
- Rebar (optional), half-inch diameter, 18 to 24 inches long, adds tensile strength to footings in high wind or seismic zones
- Safety glasses, work gloves, and steel-toed boots, protect against flying debris, concrete burns, and accidental drops
A manual post hole digger costs around twenty dollars and handles most residential pergola projects, but a power auger cuts digging time by two-thirds if you’re setting six or more posts. Rent one for a day rather than buying unless you have multiple projects planned. Sonotubes are worth the small extra cost in unstable soil, while rebar becomes important if your local code requires it or if you’re building in a region with strong winds or earthquakes.
Safety Warnings and Precautions
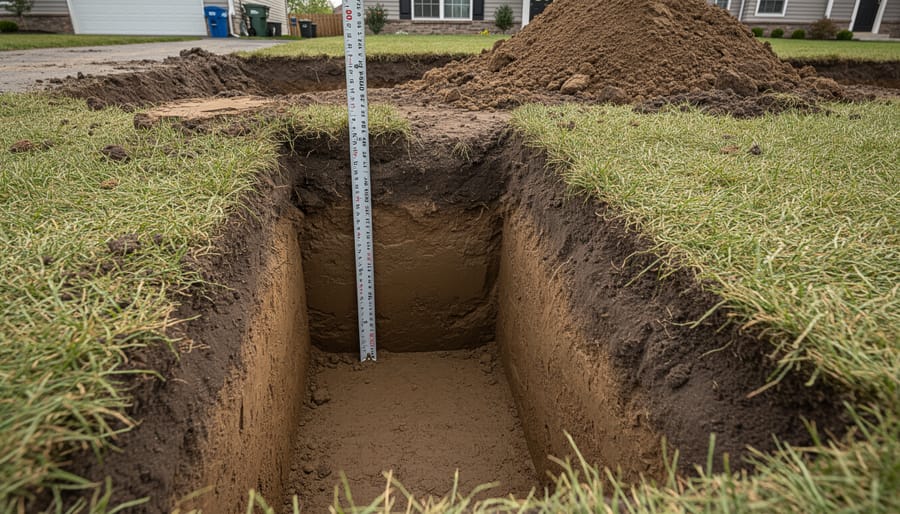
Before you break ground, understanding and following basic safety protocols will protect you, your property, and your neighbors from potentially serious, and expensive, accidents.
Warning: You are legally required to call 811 at least two to three days before digging to have underground utilities marked, failure to do so can result in injuries, service disruptions, fines, and liability for repair costs.
Once utility lines are marked with flags or spray paint, maintain at least 18 to 24 inches of clearance from any marked lines when digging your footing holes. Gas, water, electrical, and fiber optic lines are often buried at depths that overlap with frost-line footings, so you cannot skip this step. Even if you think you know where lines run based on your house layout, underground paths can surprise you.
Wear heavy-duty work gloves to protect your hands from blisters, splinters, and sharp rocks, and always use safety glasses or goggles when digging, mixing concrete, or working with a power auger. Concrete dust and flying debris can cause serious eye injuries. If you’re handling 60 to 80-pound bags of concrete mix, never lift them alone, recruit a partner to avoid back strain or dropped bags that can crush toes.
Open post holes become tripping hazards, especially if your project spans multiple days. Cover each hole with a piece of plywood weighted down with a cinder block, or mark the perimeter with caution tape and stakes. Children and pets can easily fall into an unmarked three-foot-deep hole. When adding a gravel drainage base at the bottom of each footing, work carefully to avoid slipping on loose stone.
Step-by-Step: Setting Pergola Footings Below the Frost Line
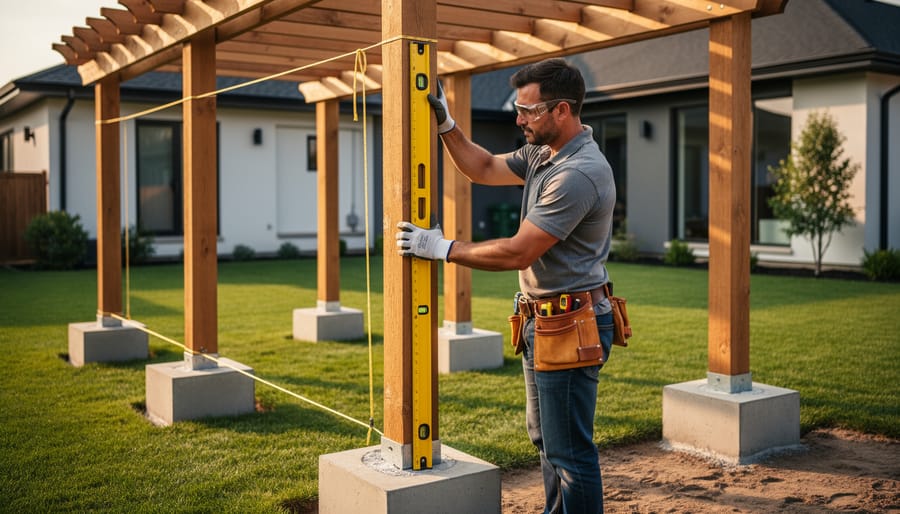
Calculating the Right Footing Depth
Start with your local frost line depth and add at least six inches to that number. That’s your minimum footing depth. If your area has a 36-inch frost line, you’ll need to dig at least 42 inches down. A 48-inch frost line requires 54-inch holes.
This extra six inches creates a safety margin below the maximum freeze depth, accounting for unusually cold winters or localized cold pockets in your yard. It also provides room for a gravel base that improves foundation drainage and reduces frost heave risk.
Some situations demand deeper footings than the basic calculation. If you’re building a heavy gazebo with a solid roof, your local code may require an additional 6 to 12 inches. Pergolas taller than 12 feet or those in high-wind zones often need deeper footings for stability. Sandy or loose soil may also call for increased depth.
When in doubt, dig deeper. An extra few inches of hole costs you minimal time and concrete but provides significantly better frost protection and structural support.
Digging the Footing Holes
Start by marking each hole location with spray paint or stakes, then begin digging from the center outward to maintain a vertical path. Keep your post hole digger or auger perpendicular to the ground, frequent checks with a level against the hole’s edge will save you from crooked excavation that’s tough to fix later.
For manual digging, work in small bites: twist the digger, lift, and clear debris often. If you hit rocks, use a digging bar or spud bar to break them loose rather than forcing your digger. Clay soil sticks to blades, scrape it off regularly and consider wetting extremely dry clay to make it more workable. Sandy soil collapses easily, so dig slightly wider at the top to create a stable cone shape and work quickly once you reach depth.
Rent a power auger for projects with four or more holes, especially in hard-packed or rocky ground. Manual diggers work fine for two or three holes in average soil, but they’re exhausting in difficult conditions. Whatever method you choose, measure depth frequently from a straight board laid across the hole’s top to ensure you’ve reached your target depth before moving to the next location.
Pouring and Setting the Concrete Footings
Start by mixing your concrete to a thick, oatmeal-like consistency, too wet and it won’t support the post, too dry and it won’t fill voids properly. Most bag mixes need about three quarts of water per 80-pound bag, but check the manufacturer’s instructions and add water gradually. Mix in a wheelbarrow or mixing tub until you achieve a uniform texture with no dry pockets.
Pour the concrete in stages rather than dumping it all at once. Fill the hole about six inches at a time, then use a long stick or piece of rebar to poke and agitate the mix, working out air pockets that could weaken the footing. This process, called consolidating, ensures the concrete flows around any gravel base and fills the entire hole.
If you’re using post anchors, embed them in the concrete while it’s still wet, making sure the bracket sits perfectly level and the anchor bolts extend straight up. For posts set directly in concrete, insert the post immediately after pouring and check it with a level on two adjacent sides. Even a slight lean will be magnified over the post’s height.
Temporary bracing is essential. Attach two or three wood braces from the post to stakes driven into the ground around the hole, forming a tripod that holds the post plumb. Recheck level every ten minutes during the first hour as concrete settles. Don’t disturb the footing for at least 48 hours, and wait a full week before applying any structural loads.
Special Considerations for Gazebos vs. Pergolas
While both pergolas and gazebos need frost-line footings, gazebos typically demand beefier support. A pergola’s open-roof design means less surface area catching wind and snow. A gazebo, with its solid roof and often enclosed sides, creates significantly more load and wind resistance. That extra weight and exposure translate directly into larger, deeper footings.
For a standard 10×10 freestanding pergola, 8-inch diameter footings extending 6 inches below frost line usually suffice in most climates. A comparable gazebo might require 12-inch diameter footings or even rebar reinforcement. The difference comes down to physics: a heavy snowfall that slides off a pergola’s slatted roof can pile up on a gazebo’s solid canopy, doubling or tripling the load on each post.
Attached structures introduce another variable. A pergola bolted to your house ledger shares some load with the existing foundation, potentially allowing you to use slightly smaller footings on the freestanding side. A freestanding gazebo bears 100 percent of the load on its own footings, requiring full structural capacity at every corner.
Wind exposure matters more than most DIYers realize. Exposed hilltop installations or areas with frequent storms need wider footings to resist lateral forces. Similarly, regions with heavy snow loads (anything over 30 pounds per square foot) should upsize footing diameter by at least 4 inches. Check whether certifications protect your structure against local weather extremes.
When should you call an engineer? If your gazebo exceeds 12×12 feet, includes a hot tub or heavy built-in seating, sits on a slope, or faces extreme weather conditions, professional load calculations ensure your footings won’t fail. The consultation fee is minor compared to rebuilding a collapsed structure.
Verification and Inspection: How to Know You’re Done Right
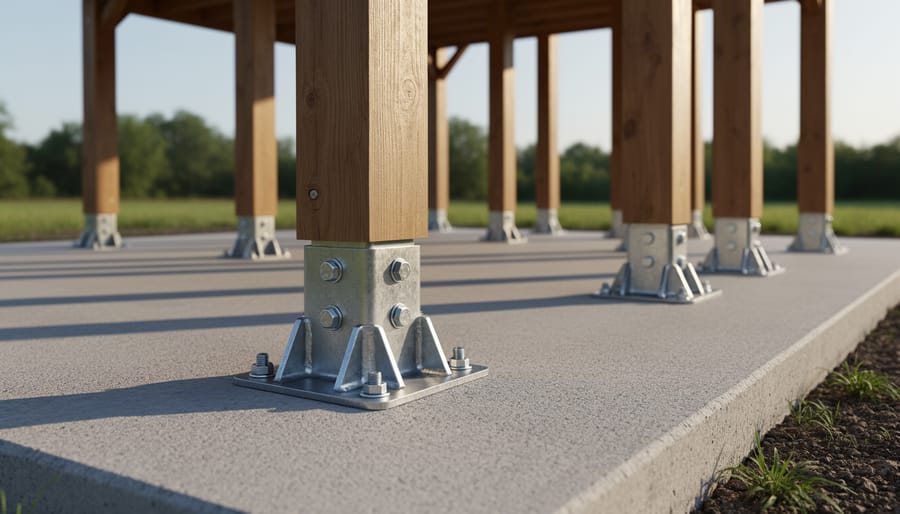
Once you’ve poured and set your posts, the real work is confirming everything is correct before the concrete finishes curing. Within the first hour after pouring, double-check that each post is perfectly plumb using a level on two adjacent faces. Even a slight lean now becomes a major structural issue later. Measure diagonally between opposite posts to verify they’re aligned and square; the diagonals should match within a quarter inch.
Tip: Most jurisdictions require a permit and inspection for permanent structures with footings; check local permit requirements before you dig to avoid fines or teardown orders.
Let the concrete cure fully before adding any load. Seven days is the standard minimum, though cold weather extends that timeline. After curing, schedule your inspection if your municipality requires one. Inspectors typically verify footing depth, concrete quality, post alignment, and proper anchoring methods. They may measure the depth of your holes or check documentation photos you took during the pour. Keep receipts for concrete and materials; inspectors sometimes ask for proof you used code-compliant products.
If you skipped the permit process, be aware of permit expiration rules that can complicate later projects or property sales. When the inspector signs off, you’re clear to build up from your footings with confidence that your pergola will stand firm through freeze-thaw cycles for decades.
Common Mistakes to Avoid
Even experienced DIYers can stumble when setting pergola footings. Knowing the most common pitfalls helps you avoid costly do-overs and structural headaches down the road.
Skipping the frost line research entirely. Some builders assume all footings need the same depth or simply guess based on what a neighbor did. The consequence? Footings above the frost line will heave during freeze-thaw cycles, cracking concrete and pushing posts out of alignment. Your pergola might tilt, posts can snap, and you’ll face expensive repairs. Always verify your local frost depth through building codes or county records before you dig.
Not calling 811 before digging. This is the most dangerous mistake. Hitting a buried gas line, electrical cable, or water main can cause explosions, electrocution, floods, and massive repair bills. Call 811 at least two business days before you start, and wait for utilities to mark your yard. It’s free and could save your life.
Eliminating the gravel base to save time. That four to six inches of crushed gravel at the bottom of each hole provides drainage and prevents water from pooling around the footing. Without it, trapped moisture can freeze, expand, and crack your concrete from below. Spend the extra fifteen minutes per hole.
Here’s a quick checklist of other mistakes to watch for:
- Pouring concrete in freezing temperatures (concrete won’t cure properly and loses strength)
- Setting posts directly in wet concrete without temporary bracing (posts shift before concrete sets)
- Using posts before the seven-day cure time (premature loads crack footings)
- Ignoring permit requirements (you risk fines and forced removal of your structure)
- Choosing undersized footing diameter for heavy gazebos (leads to settling and instability)
Double-check your work at each stage. Fixing a mistake after concrete cures means jackhammering and starting over, which costs far more than doing it right the first time.
Frequently Asked Questions
Setting pergola footings can raise plenty of questions, especially when you’re tackling frost lines and concrete work for the first time. Here are answers to the most common concerns homeowners face during the footing installation process.
Can I pour footings in freezing weather?
No, concrete should not be poured when temperatures drop below 40°F, as freezing conditions prevent proper curing and weaken the final strength. If you must work in cold weather, use special cold-weather concrete mix and protect the footings with insulated blankets for at least three days.
What if I hit solid rock before reaching the frost line?
If you encounter bedrock before the required depth, stop digging, rock does not heave or shift like soil, so it provides a stable base. However, contact your local building department to confirm this exception meets code requirements in your area.
Do I need rebar in my pergola footings?
Rebar is not typically required for standard residential pergola footings, but it adds strength and is often recommended for larger structures, heavy roof loads, or areas with expansive soil. Check your local building code, as some jurisdictions mandate reinforcement for any concrete footing.
How long before I can build on the footings?
Wait at least 48 hours before removing bracing and beginning construction, but concrete reaches full strength after seven days of curing. For best results, keep the concrete moist during this period by misting it daily or covering it with plastic sheeting.
Another frequent question concerns whether gravel alone provides enough support without concrete. Gravel-only footings may work for temporary or lightweight structures in areas with no frost line, but they won’t prevent heaving in freeze-thaw climates. For any permanent pergola or gazebo installation, concrete footings below the frost line are the only reliable solution.
Some homeowners wonder if they can reuse existing patio footings for their pergola. This depends entirely on the depth and condition of those footings. If the original footings were poured below the frost line and remain structurally sound, they may work, but you’ll need to verify their depth and potentially add anchor brackets. When in doubt, pouring new footings tailored to your pergola’s specific needs is the safer choice.
Setting your pergola or gazebo footings below the frost line isn’t just a building code formality, it’s the difference between a structure that stands strong for decades and one that tilts, cracks, or heaves after a single winter. The extra effort you invest in digging those few additional inches, verifying your local frost depth, and allowing concrete to cure properly will pay off every season your outdoor space remains level and secure.
Yes, this project takes time and some elbow grease, but it’s absolutely manageable for a motivated DIYer who follows the steps carefully. You’ve learned how to find your frost line, dig the right depth, pour concrete properly, and verify your work. Don’t rush the process, and don’t skip calling 811 or checking local codes. Those precautions protect both you and your investment.
With solid footings in place, you’re ready to enjoy your pergola or gazebo for years to come. Looking for more guidance on outdoor structures? Explore our other articles on pergola installation tips, shed foundation options, and seasonal maintenance strategies to keep your backyard projects looking their best.