


How to Assemble a 6×8 Greenhouse: Complete Instructions with Tools, Time, and Help You’ll Need

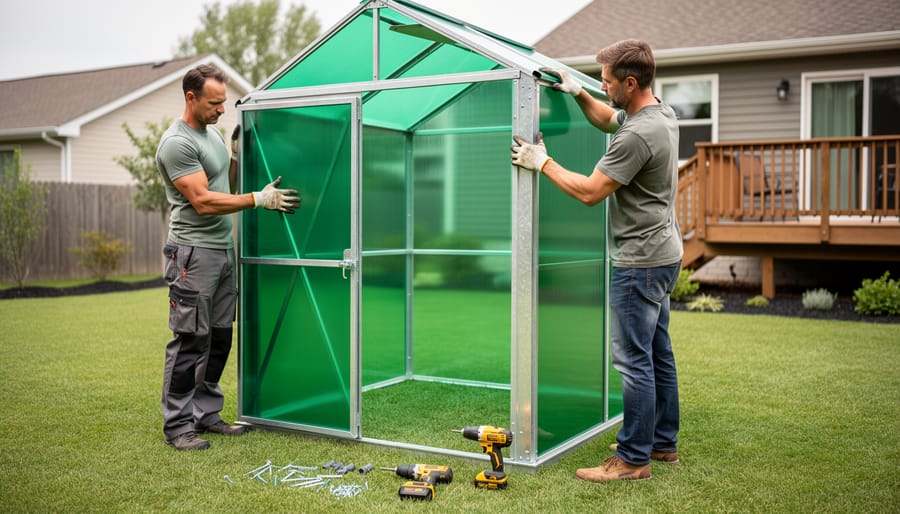
Assembling a 6×8 greenhouse typically takes 4-6 hours with two people and requires basic hand tools like screwdrivers, wrenches, and a level. Most kits follow a similar sequence: laying the foundation frame, building the walls, installing the door, and securing the roof panels. The process isn’t complicated, but attention to detail during each phase prevents frustrating adjustments later.
If you’ve just unboxed your greenhouse kit or you’re considering whether you can handle the assembly yourself, you’re in the right place. The compact 6×8 footprint makes this size ideal for backyard gardeners who want serious growing space without overwhelming their yard or their weekend. One homeowner in Oregon told us she was nervous about tackling the project alone but found that having a friend hold panels steady while she secured the bolts made all the difference.
The key to a smooth build is working methodically through each stage rather than rushing ahead. Starting with a perfectly level base saves you from chasing alignment problems when you reach the roof. Understanding which panels go where before you start fastening anything eliminates most assembly headaches. This guide walks you through every step, from unpacking your kit to double-checking that your doors open smoothly and your structure stands square and sturdy.
Key Takeaway: Two people can complete a 6×8 greenhouse assembly in 4-6 hours under normal conditions. Solo assembly stretches to 8-10 hours and risks panel damage, while adding a third helper can reduce time to 3-4 hours. Kit quality, panel type, and weather significantly impact these estimates.
What You’ll Need Before You Start
Before you start assembling your 6×8 greenhouse, gather everything you’ll need to make the process smooth and efficient. Having the right tools and materials on hand prevents frustrating mid-project trips to the hardware store and keeps your timeline on track.
Most greenhouse kits come with an assembly instructions PDF and the main structural components, but you’ll supply the tools and often the foundation materials. Here’s what to have ready:
- Phillips and flathead screwdrivers (or cordless drill with appropriate bits)
- Adjustable wrench or socket set for nuts and bolts
- Carpenter’s level (at least 24 inches long)
- Tape measure
- Stepladder (6-foot height recommended)
- Rubber mallet for gentle panel adjustments
- Utility knife for trimming and opening packages
- Work gloves to protect hands from sharp edges
- Safety glasses, especially when handling panels
Beyond tools, you’ll need foundation materials unless you’re assembling on an existing concrete pad. Most 6×8 greenhouses perform best on a gravel base (about 4 inches deep), pressure-treated lumber frame, or concrete foundation. You’ll also want ground anchors or auger stakes to secure the structure against wind, these typically aren’t included in kits but are critical for long-term stability.
Check your kit’s parts list immediately when it arrives. Verify that all frame pieces, panels, hardware bags, door components, and vents are present before you begin assembly. Missing parts are easiest to resolve before you’ve started construction.
The single most important “supply” is a second person. While solo assembly is technically possible, having a helper cuts your time in half and makes panel installation far safer and easier. One person can hold panels steady while the other secures them, preventing frustrating alignment issues and potential damage. If you’re recruiting a friend or family member, plan for a solid afternoon together and have cold drinks ready as thanks.
Safety Precautions and Site Preparation
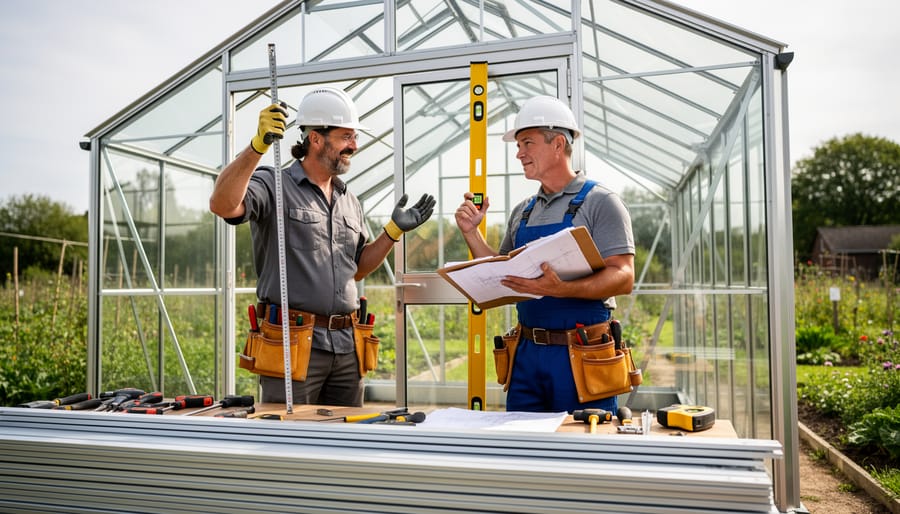
Before you start assembling your 6×8 greenhouse, take time to address safety and site preparation, skipping these steps can lead to injuries or a crooked structure that won’t last.
Safety First: Protecting Yourself During Assembly
Working with greenhouse panels requires careful handling. Polycarbonate and glass sheets have sharp edges that can easily cut skin, so wear work gloves throughout the entire process. When carrying large panels, especially in windy conditions, get your helper to support the opposite end, wind can catch a panel like a sail and pull it from your grip or shatter it against the frame.
Warning: Never attempt to install panels or work at height alone, and avoid assembly on windy days (over 10 mph winds) as gusts can turn lightweight materials into dangerous projectiles.
If your kit includes glass panels, wear safety glasses and long sleeves. When using a ladder to install roof panels or vents, ensure it’s on stable, level ground and have someone hold it steady. Don’t overreach, reposition the ladder instead.
Preparing Your Site for Success
Your greenhouse needs a level foundation to function properly and prevent structural stress. Choose a spot with good sun exposure and check that the ground is level using a long board and carpenter’s level. If the site slopes, you’ll need to level it by removing soil from the high side or building up the low side.
Before digging or driving anchors, call 811 to locate underground utilities, hitting a gas line or electrical cable is both dangerous and expensive. Mark out your 6×8 footprint with stakes and string to visualize the final placement.
For the foundation itself, you have three main options. A gravel base (4-6 inches deep) provides excellent drainage and is the easiest DIY option. A concrete slab offers maximum stability but requires more skill and expense. A pressure-treated wood frame base works well and allows you to level an uneven site, though it will need replacement eventually. Whichever you choose, it must be perfectly level and square, measure both diagonals of your rectangle, and they should match exactly.
Step-by-Step 6×8 Greenhouse Assembly Instructions
Step 1: Prepare the Foundation and Base Frame
Start by laying out the base frame components on your prepared, level foundation, whether that’s a gravel pad, concrete slab, or treated timber base. Identify the two long rails (8 feet) and two short end pieces (6 feet), along with the corner brackets included in your kit. Most kits use aluminum or galvanized steel framing material which assembles with pre-drilled holes and bolts.
Connect the four base rails at the corners using the provided brackets and bolts, but don’t fully tighten them yet. Position the assembled rectangle on your foundation, then measure diagonally from corner to corner in both directions, these measurements must match exactly to confirm your base is square. If they’re off by more than a quarter-inch, adjust the frame gently until diagonal measurements are equal.
Once square, use a spirit level to verify the frame sits perfectly level in both directions. Make any needed adjustments to your foundation now, adding or removing gravel as needed. When satisfied, tighten all corner bolts firmly and anchor the base to your foundation using the ground stakes, concrete anchors, or mounting bolts specified in your kit instructions. This secure, square base prevents alignment headaches later.
Step 2: Build the Wall Frames
With the base secure, you’re ready to assemble the wall frames. Start by laying out all vertical and horizontal frame pieces on a flat surface near the greenhouse base. Most 6×8 kits label parts with stickers or codes, double-check these against your instruction manual to avoid mixing up similar-looking pieces.
Begin with one end wall. Connect the vertical corner posts to the top and bottom horizontal rails using the provided bolts, but don’t fully tighten yet. Insert any center mullions or cross-braces as shown in your diagrams. Repeat this process for the opposite end wall, then move on to the two longer side walls.
Once all four frames are loosely assembled, stand each wall upright and attach it to the base frame at the corners. This is where a helper becomes essential, one person holds the frame plumb while the other secures it. Use a level on each vertical post to confirm it’s perfectly straight before tightening bolts.
Temporarily brace the walls with diagonal supports or spare lumber to prevent them from shifting. Check that opposite walls are parallel by measuring diagonally from corner to corner, both measurements should match within a quarter-inch. Adjust as needed before fully tightening all connections.
Time estimate: 1-1.5 hours
Step 3: Install the Roof Frame and Ridge
With the wall frames standing securely, you’re ready to connect the roof structure, the step that brings your 6×8 greenhouse its final shape. Start by identifying your roof rafters or arched ribs and the ridge beam (the horizontal piece that runs along the peak). Most kits use pre-drilled parts, so match the holes carefully before inserting bolts.
Position the first pair of rafters at one end, securing them to the top of the wall frames with the provided hardware. Don’t fully tighten yet, leave a bit of play to adjust alignment. Work your way toward the opposite end, attaching each rafter pair in sequence. If your kit includes a center support or ridge beam, install it now between the rafters to lock everything in place.
Once all roof components are loosely connected, step back and check that the structure looks symmetrical and the ridge sits level. Use your level to verify, then tighten all bolts firmly, working from one end to the other. Give the frame a gentle shake, it should feel solid with minimal wobble.
This step typically takes 45 minutes to an hour with two people. Patience here prevents headaches later when you’re installing panels on a crooked frame.
Step 4: Attach Panels and Glazing
Now you’ll attach your panels, the most visible part of your greenhouse and the step where careful handling pays off. Most 6×8 kits use polycarbonate panels, though some feature glass or reinforced plastic. Whichever material your kit includes, always work from bottom to top so upper panels overlap lower ones and shed water properly.
Start by identifying which panels go where. End walls typically install first, followed by side walls, then roof panels. Remove only one panel from its protective packaging at a time to minimize the risk of scratches or cracks. Handle polycarbonate sheets by the edges, never the center, and avoid bending them beyond their natural flex.
Most kits use either H-channels (where panel edges slide into aluminum or plastic tracks) or clip systems. For H-channels, slide the panel fully into the bottom track before securing the top. Leave a small expansion gap, about 1/8 inch, at each end to allow for temperature changes. If you’re using clips, start at one corner and work systematically across, spacing clips every 12-18 inches as specified in your kit instructions. Don’t overtighten; snug is enough.
If you had questions when you originally chose glazing materials, you’ll appreciate them now, thicker polycarbonate offers better insulation but weighs more and requires more secure mounting. Apply weatherproof sealant or foam tape along the top edges where panels meet the roof frame to prevent leaks.
Work on calm days if possible. Wind catches panels like sails, making installation frustrating and dangerous. Your helper should support each panel as you secure it, preventing stress on the mounting points. Expect this step to take 1.5-2 hours for a standard 6×8 greenhouse.
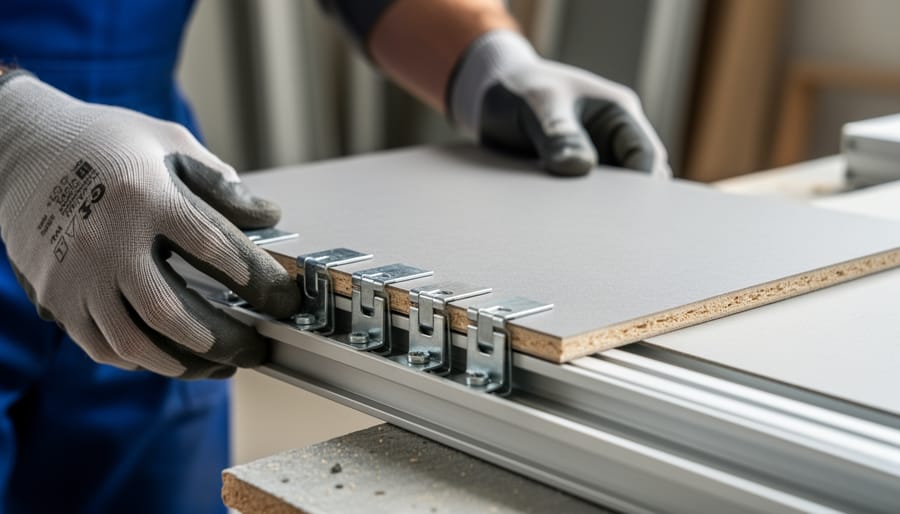
Step 5: Install Door, Vents, and Final Hardware
With the panels secure, it’s time to install the door and vents, the final structural components that make your greenhouse functional. Start by hanging the door according to your kit’s hinge system. Most 6×8 greenhouse doors slide into track channels or attach with three or four hinges. Line up the door frame carefully, checking that it’s plumb before tightening the screws. The door should swing freely without scraping the bottom or binding at the top.
Next, install any roof vents or side windows. These typically mount with brackets and should open smoothly on their hinges or automatic openers. Test the vent mechanism several times to ensure proper operation before moving on.
Add weather stripping around the door frame and any opening panels. This foam or rubber seal prevents heat loss and keeps out drafts and pests. Cut it to length and press it firmly into the channels provided.
Finally, do a complete hardware check. Walk around your greenhouse tightening every bolt, screw, and clip you’ve installed. Pay special attention to roof connections and panel clips, these take the most stress from wind. This systematic check prevents rattles and potential failure points later. The entire process takes 30 to 45 minutes and ensures your greenhouse operates as designed.
Step 6: Final Adjustments and Anchoring
Once all panels and hardware are in place, spend about 30 minutes on final checks and securing your 6×8 greenhouse. Walk around and tighten any loose bolts, panels can shift during assembly, so give each connection a quarter-turn check. Test the door by opening and closing it several times; it should swing smoothly without scraping or binding. If it sticks, loosen the hinge bolts slightly and adjust until it operates freely, then retighten.
Check that roof vents open and close fully without resistance. Adjust the vent arms or automatic openers according to the manufacturer’s specs so they don’t jam mid-season.
Now anchor the structure. Even a 6×8 greenhouse can lift or shift in strong winds. Drive ground anchors through the base frame holes into the soil, or use concrete anchors if you built on a slab. Alternatively, secure the frame to a timber foundation with galvanized screws. For extra stability on soft ground, attach auger anchors at each corner and midpoint along the sides. Give the frame a firm shake, if it wobbles, add more anchors or tighten existing ones until the greenhouse feels rock-solid.
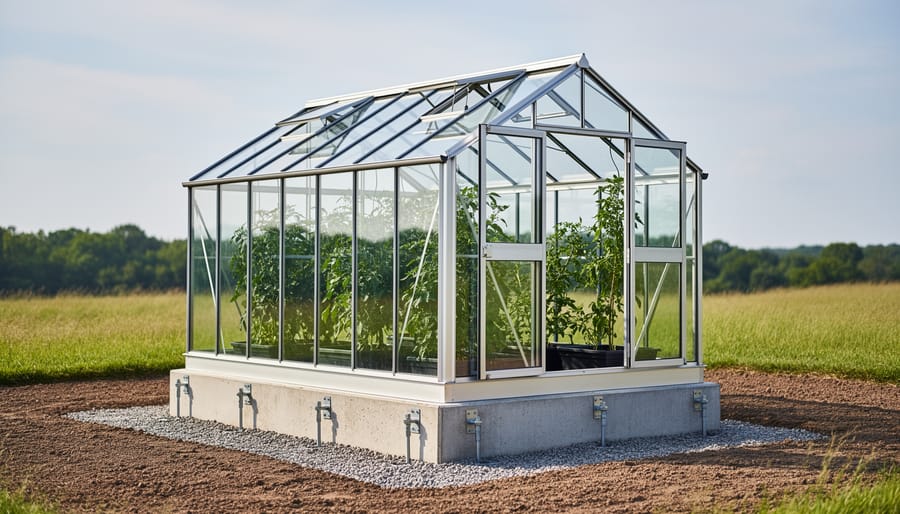
How to Verify Your Greenhouse Is Properly Assembled
After you’ve tightened the last bolt and stepped back to admire your work, take 15 minutes to run through a systematic verification check. This final inspection catches small issues now before they turn into bigger problems later.
Start with a visual walk-around of the entire structure. Check that all panels sit flush in their channels without gaps or misalignment. Gently press on each panel to confirm it’s secure, it shouldn’t rattle or flex excessively. Run your hand along the joints between panels and feel for air gaps that could let in rain or cold air.
Test the door next. It should open and close smoothly without scraping or binding, and the latch should engage firmly. If the door drags at the bottom or won’t stay closed, loosen the hinge screws slightly and adjust the position before retightening. Open and close any roof vents or windows several times to verify they operate freely and lock in the open position without sagging.
Use your level one more time to confirm the structure hasn’t shifted. Check both the base frame and the door frame in multiple spots. Grab a corner post and give it a firm shake, there shouldn’t be any wobbling or movement at the base.
Here’s your complete verification checklist:
- All panels are seated properly in their frames with no visible gaps
- Door opens, closes, and latches without resistance or alignment issues
- Roof vents and windows operate smoothly and lock securely
- Structure is level front-to-back and side-to-side
- All bolts, screws, and clips are tight with no missing hardware
- Base is firmly anchored to the foundation or ground
- No sharp edges or protruding fasteners that could cause injury
- Weather stripping is in place around the door and any openings
If you find misaligned panels, don’t force them, loosen the nearest frame connections, adjust the panel into position, then retighten everything. For a stuck or misaligned door, check that the frame is square by measuring diagonally from corner to corner; both measurements should match within a quarter inch. Minor gaps in seals can be fixed with weatherproofing tape or clear silicone caulk applied along the seam.
Time and Manpower Requirements: What to Expect
Plan on dedicating a full day to assembling your 6×8 greenhouse, even if you won’t need all of it. With two people working together, the recommended minimum, expect the job to take 4-6 hours from foundation to final panel. This timeframe assumes you’re reasonably handy, have all tools ready, and encounter no major hiccups with parts or weather.
Going solo is possible but not advisable, you’re looking at 8-10 hours, with real risk of cracking panels when you can’t hold the frame steady while fastening. Panel installation and roof work genuinely need four hands. A three-person team can knock the project out in 3-4 hours, as one person can prep the next step while two handle assembly.
Several factors push assembly time up or down. Higher-quality kits with pre-drilled holes and clear instructions shave an hour or more off the process compared to budget kits requiring improvisation. Glass panels demand extra care and slow you down compared to lightweight polycarbonate. Wind above 10-15 mph makes panel installation frustrating and dangerous, reschedule for a calmer day. If you’re stepping up to an 8×8 greenhouse size add another 1-2 hours to these estimates for the additional panels and frame sections. First-time greenhouse builders should add 30-60 minutes to account for the learning curve.
Frequently Asked Questions
Do I need a permit to install a 6×8 greenhouse?
It depends on your local building codes. Most municipalities don’t require building permits for greenhouses under 10×12 feet without permanent foundations, but you should check with your city or county building department to confirm specific requirements for your area.
Can I assemble a 6×8 greenhouse alone?
While technically possible, it’s not recommended. You’ll struggle with holding panels in place, keeping frames square, and managing roof assembly safely. Having at least one helper cuts assembly time in half and prevents costly mistakes.
What if parts are missing from my greenhouse kit?
Check the parts list immediately upon delivery and contact the manufacturer or retailer within 48 hours if anything’s missing. Most companies ship replacement parts quickly at no charge, and catching issues early prevents frustrating delays mid-assembly.
How do I anchor my greenhouse in windy areas?
Use ground anchors or auger-style stakes driven at least 18 inches deep at each corner and midpoint of longer walls. For extreme wind zones, consider concrete footings or attach the base frame to a concrete slab with expansion bolts.
Can I move my greenhouse after assembly?
Yes, but it requires partial disassembly. You’ll need to remove panels, disconnect the base from anchors, and potentially take apart the frame depending on the design. It’s easier to choose the right location from the start.
What’s the hardest part of greenhouse assembly?
Most people find panel installation the trickiest step because it requires careful handling to avoid cracks while ensuring proper alignment and weatherproofing. Taking your time and having a helper makes this much easier.
Once you’ve got your greenhouse assembled and operational, you’ll want to think about year-long greenhouse maintenance to keep it functioning properly through all seasons. Regular checks of seals, vents, and structural connections prevent small issues from becoming bigger problems down the road.
You’ve made it through the assembly process, congratulations! Building a 6×8 greenhouse from scratch might have seemed daunting at first, but with the right tools, a helping hand, and a bit of patience, you’ve created a dedicated space for year-round growing. Most DIY homeowners successfully complete their greenhouse assembly in an afternoon, and you’re now part of that group.
Now comes the fun part: making your greenhouse work for you. Set up shelving to maximize vertical space, ensure your vents are operating smoothly for temperature control, and start planning what you’ll grow first. Whether it’s starting seedlings in early spring or keeping herbs thriving through winter, your new greenhouse opens up possibilities that weren’t available before.
If you ran into any hiccups during assembly or have questions about optimizing your setup, Storage Sheds Outlet offers both quality greenhouse kits and helpful customer support to guide you through any challenges. Your greenhouse is ready, time to get growing.