
Why Your Pergola Needs Proper Anchoring (Before the Next Storm)
A poorly anchored pergola can topple in the first serious windstorm, turning your backyard retreat into a dangerous liability. The difference between a structure that stands strong for decades and one that fails comes down to choosing the right anchoring method for your specific situation.
Most homeowners face a key decision early on: should you anchor into concrete, use ground spikes, or mount directly to an existing patio? Each method works brilliantly in the right context and fails miserably in the wrong one. A concrete deck demands a completely different approach than soft soil, and what works for a lightweight 8×10 kit won’t cut it for a heavy timber structure.
The good news is that proper anchoring isn’t complicated once you understand the basics. You don’t need specialized skills for most installations, though you do need to match your method to your ground conditions, local wind loads, and pergola weight. Getting this right the first time saves you from expensive do-overs and potential damage to your property.
This guide walks you through every anchoring option available in 2026, from traditional concrete footings to newer bracket systems. You’ll learn how to assess your yard conditions, calculate the holding strength you actually need, and spot the warning signs that an existing pergola needs reinforcement. Whether you’re planning a new installation or fixing stability issues with a structure that’s already up, you’ll finish with a clear action plan tailored to your specific setup.
What Makes Pergola Anchoring Different From Other Outdoor Structures
Pergolas present a distinct challenge when it comes to anchoring because their deliberately open design, while visually appealing, works against structural stability in ways that catch many homeowners off guard. Unlike a shed with four solid walls to block wind, or a gazebo with enclosed sides that create a unified structure, a pergola is essentially a skeleton of posts and beams. This openness means wind doesn’t just push against it, it flows through, around, and over it in unpredictable patterns.
The real trouble starts with what engineers call “wind uplift.” When wind hits the horizontal beams and slatted roof of your pergola, it creates upward pressure that literally tries to lift the entire structure off the ground. A shed’s weight and enclosed walls help it resist this force, but a pergola’s lightweight construction and open framework make it vulnerable to being pried loose from its anchors during storms.
Warning: Pergolas can experience wind uplift forces three to four times stronger than similar-sized enclosed structures, making them particularly vulnerable to anchor failure during storms if not properly secured.
Weight distribution adds another layer of complexity. A typical 10×12 shed might weigh 1,500 to 2,500 pounds, with that mass spread across a floor frame that keeps everything grounded. Your pergola, by contrast, might weigh only 500 to 800 pounds, and all that weight sits on just four or six posts. There’s no floor to tie the structure together, no walls adding mass and rigidity. Each post must resist not just downward compression but also sideways racking forces and that upward lift, all while supporting a fraction of the total weight.
The leverage problem makes things worse. Those tall posts act like levers, with wind pressure at the top trying to pry the bottom out of the ground. A six-foot shed wall faces similar wind, but the shorter height reduces the leverage effect. An eight or ten-foot pergola post, however, amplifies every gust into serious force at the anchor point.
Signs Your Pergola Needs Better Anchoring
You don’t always need to wait for a major storm to know your pergola has anchoring problems. Most stability issues show themselves through subtle warning signs that homeowners often dismiss as normal settling or minor imperfections.
The most obvious red flag is physical movement when you push against a post. If you can rock a pergola post back and forth with moderate hand pressure, the anchoring is inadequate. Healthy installations should feel absolutely solid, with no give at all. Even slight wobbling indicates the anchor points are compromised or were never sufficient in the first place.
Check the base of each post after rain or wind. Gaps between the post and the ground, or between the post base and a concrete pad, signal that movement has occurred. These gaps might start small, just a quarter-inch crack, but they grow with each weather event. You might also notice fresh soil disturbance around ground-level posts, showing they’ve shifted position.
Post-storm inspections often reveal problems you’ve been ignoring. If your pergola looks slightly crooked after moderate wind, or if you notice the roof beams no longer sit evenly, the structure has moved from its original position. Pergolas should return to perfect plumb after wind subsides; any lasting tilt means the anchoring failed to hold.
Look for rust stains or deterioration around metal anchoring hardware. Surface-mounted brackets that show loosening bolts, cracked concrete around anchor points, or bent metal components all indicate your pergola is working against its anchors during weather stress. Catching these signs early prevents the much costlier problem of replacing posts or repairing structural damage from a complete failure.
The Four Main Pergola Anchoring Methods Explained
Concrete Footings: The Gold Standard
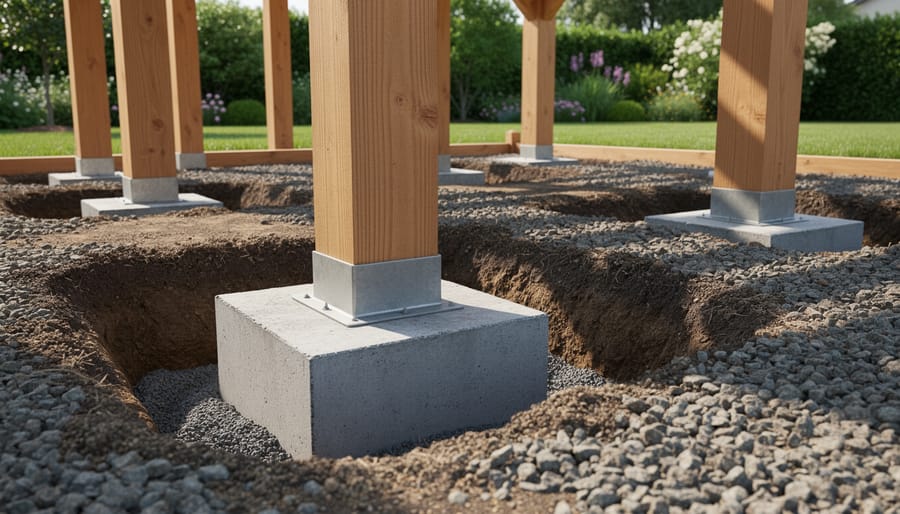
Concrete footings remain the most reliable anchoring method for pergolas, and for good reason. When you dig below the frost line and surround your posts with cured concrete, you’re creating a permanent foundation that resists uplift, prevents lateral movement, and distributes the structure’s weight evenly into stable soil layers.
The frost line matters more than most homeowners realize. In northern climates, freeze-thaw cycles can lift improperly anchored posts several inches over a single winter. Your local building department can tell you the required depth for your area, typically ranging from 12 inches in warm regions to 48 inches or more in places like Minnesota or Maine. Going below this line means the soil around your footing stays stable year-round.
Here’s the proven process for installing concrete footings that will outlast your pergola:
- Dig holes at least 12 inches in diameter, extending 6 inches below your local frost line depth.
- Add 4-6 inches of gravel at the bottom for drainage, then tamp it firm.
- Set your post in the center using temporary bracing (scrap 2x4s work great) and check it’s perfectly plumb with a level on two adjacent sides.
- Pour concrete mix around the post, leaving the top 4 inches of the post exposed above grade.
- Slope the top of the concrete away from the post to shed water, then let it cure for at least 48 hours before removing bracing.
The upfront effort pays off in permanence. Unlike surface mounts that rely on brackets and bolts, concrete footings create a monolithic bond between your pergola and the earth. You won’t need to retighten hardware or worry about fasteners corroding over time.
Yes, this method costs more in materials and sweat equity than screw-in anchors. Budget around $15-25 per hole for concrete bags and gravel, plus tool rental if you’re tackling more than four posts. But you’re building something that will still stand firm twenty years from now, through countless storms and seasons.
Ground Anchors and Auger Systems
Ground anchors and auger systems offer a faster, less invasive alternative to concrete footings, especially if you’re working with a lightweight pergola or want something you can relocate down the road. These are basically heavy-duty screws that twist deep into the soil, creating a secure anchor point without any digging or concrete mixing.
The most common type is the spiral ground anchor, which looks like a giant corkscrew with a mounting bracket on top. You attach a driving rod or use a drill with the right adapter, then screw the anchor into the ground until the bracket sits at or just below ground level. Your pergola post then bolts directly to this bracket. Installation typically takes 15 to 30 minutes per anchor once you get the hang of it.
Screw-in auger systems work best in firm soil without too many rocks or tree roots. Sandy or very loose soil won’t grip the threads properly, and you’ll end up with a wobbly installation. Clay and loamy soils give you the strongest hold. Most residential ground anchors are rated for pergolas up to 10 feet by 10 feet, but always check the manufacturer’s weight and wind load specifications.
These systems shine for temporary or semi-permanent setups. Maybe you’re renting and can’t pour concrete, or you want the option to move your pergola in a few years. They’re also popular for lighter aluminum or vinyl pergolas that don’t need the holding power of concrete footings.
The main limitation? They’re not suitable for areas with deep frost, heavy snow loads, or high winds. A properly installed ground anchor can handle moderate weather, but it won’t match the stability of concrete in extreme conditions.
Surface Mounting on Existing Concrete
If you’re installing a pergola on an existing patio or concrete slab, surface mounting offers a clean solution that skips the digging. This method uses specialized hardware to secure posts directly to the concrete surface, making it popular for backyard makeovers where you don’t want to jackhammer your hard-earned patio.
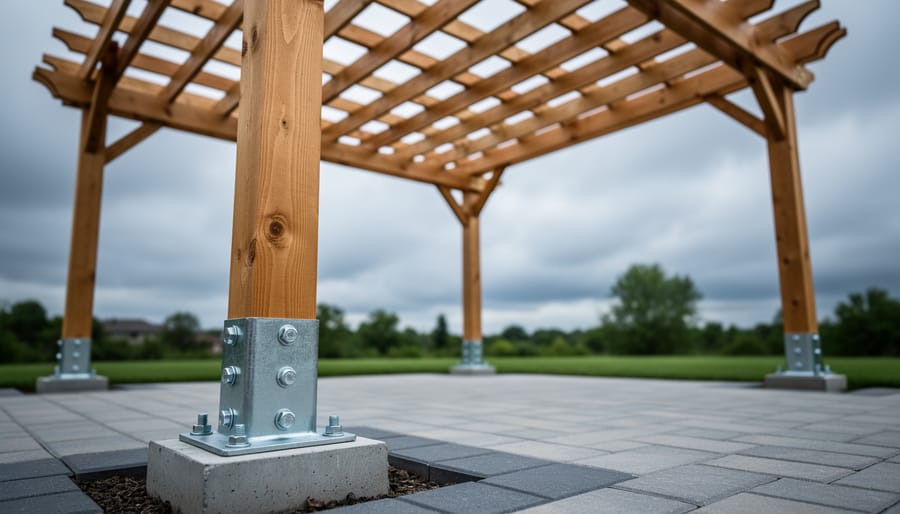
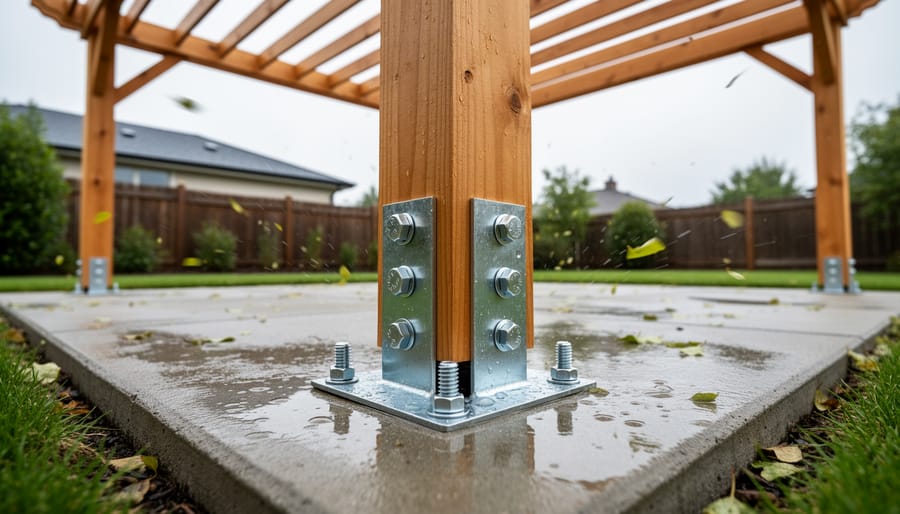
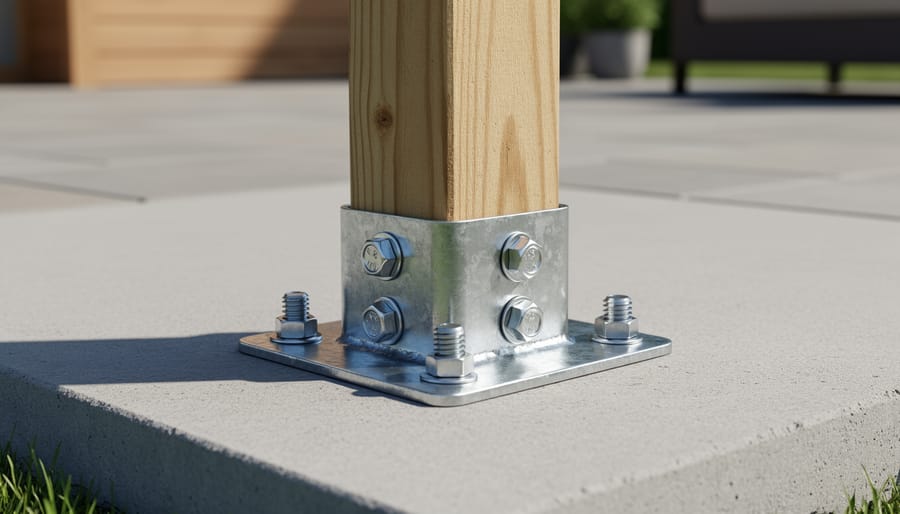
Post bases are the workhorses of surface mounting. These metal brackets bolt through the concrete and cradle the bottom of each pergola post. You’ll find two main styles: the traditional L-bracket that wraps around the post sides, and the socket-style base where the post sits inside a U-shaped channel. Socket bases typically provide better stability because they prevent the post from twisting. Most quality bases are galvanized or powder-coated to resist rust from water pooling around the connection point.
Installing them requires drilling holes into the concrete, then securing with either wedge anchors or sleeve anchors rated for outdoor use. Wedge anchors generally hold better for heavier pergolas. The critical part is getting all four bases perfectly level and square to each other before you drill. Use a laser level or string lines between positions, because once those holes are drilled, you’re committed.
For lighter pergolas or renters who might move, epoxy anchor systems offer a strong bond without permanent hardware visible above the surface. You drill oversized holes, inject two-part epoxy, then insert threaded rods that cure in place. The pergola posts attach to these embedded rods with base plates.
One reality check: surface mounting works best for pergolas under 12 feet tall. Taller structures create leverage that can stress the bolts, especially in windy areas. If you’re mounting a massive timber pergola, concrete footings make more sense than asking surface bolts to do all that work.
Hybrid Anchoring Solutions
Real-world installation sites don’t always cooperate with a single anchoring method. Maybe your yard has an existing patio on one side but soil on the other, or you’re reinforcing a pergola that’s already been up for years. That’s where hybrid approaches shine.
The most common scenario involves mounting two posts to an existing concrete patio while sinking the other two into the ground with proper footings. This works beautifully for pergolas that extend from a house or deck into the yard. The concrete-mounted posts get surface brackets with expansion bolts, while the yard-side posts sit in 12-inch diameter holes below the frost line. You get the convenience of not jackhammering your patio and the rock-solid stability where it matters most.
Another practical hybrid: using concrete footings as your primary anchors but adding screw-in ground stakes at a 45-degree angle as lateral bracing. This combination handles areas with high winds or loose soil that might allow slight movement over time. The footings carry the vertical load; the angled stakes prevent racking and twisting.
If you’re retrofitting an older pergola that wasn’t anchored properly, you can often add supplemental support without starting over. Drive heavy-duty ground anchors next to existing posts, then connect them with galvanized brackets. Think of it as insurance rather than replacement.
The key with any hybrid system is ensuring the different anchoring methods work together without creating stress points. Posts should be level across the structure, regardless of how they’re anchored.
Choosing the Right Anchoring Method for Your Situation
Picking the wrong anchoring method wastes money and sets you up for problems down the road. The right choice depends on your specific situation, not just what worked for your neighbor or what looks easiest online.
Start with your soil type. Clay soil holds concrete footings well but can shift with moisture changes, making frost heave a real concern in cold climates. Sandy soil drains beautifully but doesn’t grip anchors as tightly, so you’ll need deeper footings or larger diameter holes. Rocky soil makes digging a nightmare and often requires professional equipment or surface mounting instead. If you can’t push a screwdriver six inches into your ground without hitting rock, plan accordingly.
Your pergola’s size and weight matter more than you’d think. A 10×10 kit pergola weighs around 400-600 pounds. A custom 16×20 timber frame structure can hit 2,000 pounds or more. Heavier pergolas need more substantial anchoring, period. The sail effect counts too: larger roof areas catch more wind, creating uplift forces that can pull lighter anchoring right out of the ground during storms.
Climate drives half the decision. If you live where frost penetrates 36 inches deep, your footings need to go below that line or you’ll watch posts heave upward every spring. Coastal areas with high winds demand the most secure anchoring you can manage. Desert regions with stable, dry soil can sometimes get away with simpler solutions.
| Anchoring Method | Best For | Difficulty Level | Approximate Cost Range |
|---|---|---|---|
| Concrete Footings | Permanent installations, larger pergolas, high-wind areas | Moderate to High | $200-600 (DIY materials) |
| Ground Anchors | Temporary setups, smaller pergolas, good soil conditions | Low | $80-200 |
| Surface Mounting | Existing concrete slabs, patios, no digging allowed | Low to Moderate | $100-300 |
| Hybrid Solutions | Challenging terrain, mixed surface types, irregular layouts | Moderate | $250-500 |
Think about permanence honestly. Planning to sell your house in three years? Surface mounting on your patio gives you options. Building your dream outdoor space that you’ll enjoy for decades? Invest in proper concrete footings now.
Budget matters, but don’t let it be the only factor. Concrete footings cost more upfront but rarely need replacement. Ground anchors seem cheaper until you’re replacing them after five years of freeze-thaw cycles. The $200 you save today can turn into $800 worth of reinstallation headaches tomorrow.
Common Pergola Anchoring Mistakes (And How to Avoid Them)
Proper anchoring fails not from lack of effort but from avoidable mistakes that undermine the entire installation. Here’s what typically goes wrong and how to sidestep these problems.
Insufficient Depth
The most common mistake is shallow footings. Many homeowners dig 18 inches down and call it done, but in most climates, you need at least 36 inches to reach below the frost line. Shallow anchors work fine until the first hard freeze pushes them upward, tilting your pergola. Check your local frost depth before you start digging. If you’re using ground anchors instead of concrete, make sure they extend deep enough to grip undisturbed soil, the top 12 inches of ground is too loose to hold under stress.
Ignoring Frost Heave
Even when you dig deep enough, frost heave can still wreak havoc if you don’t account for it properly. The issue isn’t just depth but also what surrounds your footings. Compact the soil around concrete thoroughly and consider adding gravel at the base for drainage. Water pooling around footings freezes, expands, and lifts everything upward. In areas with severe winters, flared footings (wider at the bottom) resist heaving better than straight cylinders.
Wrong Hardware for Your Soil
Screw-in anchors work beautifully in firm clay but spin uselessly in sandy or rocky soil. Post brackets designed for concrete won’t grip properly on wood surfaces. Match your anchoring hardware to actual ground conditions, not what you hoped you’d find. If your auger hits rock two feet down, you’ll need to switch methods entirely rather than forcing an inadequate solution.
Skipping Temporary Bracing
Rushing to finish often means skipping the temporary bracing that keeps posts perfectly plumb while concrete cures. A post that shifts even two degrees off vertical creates cumulative problems across the entire structure. Use scrap lumber to brace posts in both directions, and don’t touch anything for 48 hours while concrete sets. That patience prevents costly corrections later.
Tools and Materials You’ll Actually Need
Walking into a hardware store without a clear list is a fast track to overspending or forgetting something crucial. Here’s what you actually need for a typical pergola anchoring project, broken down by what deserves a spot in your garage and what’s smarter to rent for a day.
Essential Tools You Should Own
A quality 48-inch level is non-negotiable. You’ll use it repeatedly during installation and for future projects around your yard. Pair it with a smaller torpedo level for checking individual posts. A post hole digger (the manual clamshell type) works fine for four to six holes in average soil and costs less than a single rental day. Add a sturdy shovel, a tamping bar for compacting soil, and a tape measure to your toolkit.
- Plumb Bob
- A weighted tool that hangs from a string to ensure your post is perfectly vertical during installation. It’s more reliable than eyeballing alignment.
- Mason’s Line
- Strong, non-stretch string used to mark straight lines between posts and maintain consistent spacing throughout your project.
- Post Hole Digger
- A long-handled tool with clamshell blades designed to dig narrow, deep holes efficiently for setting posts.
- Tamping Bar
- A heavy steel rod used to compact soil, gravel, or concrete in layers, eliminating air pockets that cause settling.
For concrete work, you’ll need a mixing container (a wheelbarrow works), a sturdy mixing hoe, and work gloves. Don’t skip safety glasses.
What’s Worth Renting
If you’re dealing with more than six holes, rocky soil, or depths beyond 30 inches, rent a power auger. A two-person gas auger handles tough conditions in minutes versus hours of manual labor. For large projects requiring significant concrete, rent a small mixer rather than hand-mixing dozens of bags.
Materials Checklist
Concrete mix is your foundation material. For four 10-inch diameter, 36-inch deep holes, plan on twelve to sixteen 80-pound bags of fast-setting mix. You’ll also need gravel for drainage (half a cubic yard typically covers four holes), your chosen post anchors or brackets, galvanized or stainless hardware, and pressure-treated lumber shims for precise positioning. Pick up a few extra bags of concrete; running short mid-pour creates weak spots you’ll regret later.
When to Call a Professional Instead of DIY
Not every pergola installation is a DIY project, and recognizing when you need professional help can save you money, time, and frustration in the long run.
If you’re dealing with rocky or extremely dense clay soil, renting equipment may not be enough. Professionals have hydraulic augers and rock-breaking tools that make quick work of conditions that would take you days to excavate manually. They also know how to adjust anchoring methods when they encounter unexpected bedrock or large boulders.
Complex yards present similar challenges. If your pergola spans multiple levels, sits on a slope, or requires retaining wall integration, the engineering involved goes beyond typical DIY skills. Professionals can properly calculate load distribution and ensure each post gets adequate support despite uneven terrain.
Size matters, too. A 10×10 kit pergola is manageable for most handy homeowners, but custom structures over 12×16 feet, especially those using heavy timber or supporting elements like roofing or lighting, benefit from professional installation. The stakes are simply higher with expensive materials.
Don’t overlook permit requirements in your area. Many municipalities require licensed contractors for structures over certain dimensions or when work involves concrete footings beyond a specific depth. A professional handles permitting, inspections, and ensures code compliance, paperwork headaches you won’t miss.
If you’re uncertain about any aspect of the anchoring process or your pergola represents a significant investment, the cost of professional installation is insurance against costly mistakes.
Maintaining Your Pergola Anchoring System
Once you have your pergola properly anchored, a simple maintenance routine keeps it stable for years. Most homeowners can handle these checks themselves in under an hour annually.
Schedule your inspection for early spring, after winter freeze-thaw cycles have done their worst. Walk around each post and push firmly to test for any give or movement. Even slight wobbling means your anchoring needs attention. Check the soil or concrete around each base for cracks, gaps, or settling. If you spot a depression forming near a post, water is pooling there and undermining your anchor.
For surface-mounted pergolas, inspect every bolt and bracket. Hardware loosens naturally over time from expansion and contraction. Tighten any loose fasteners with a socket wrench, but don’t overtighten to the point of stripping threads. Look for rust on metal components; light surface rust is normal, but flaking or deep corrosion means replacement.
Ground-level anchors need extra attention to drainage. Clear debris and mulch away from posts so water can’t sit against them. If you notice consistent pooling, add a French drain or regrade the soil to direct water away from your anchoring points.
Consider reinforcing your anchoring if you have experienced severe storms, added a roof or heavy vines, or if you live in an area with increasingly extreme weather. Adding diagonal bracing or upgrading to larger footings prevents problems before they start.
Proper anchoring isn’t just about keeping your pergola upright during the next windstorm, it’s about protecting your investment for decades. A well-anchored pergola can last 20-30 years with minimal maintenance, while one with shaky foundations might need expensive repairs or replacement within just a few seasons.
The right anchoring method for your situation depends on three main factors: your soil conditions, the pergola’s size and weight, and whether you want a permanent or temporary installation. Concrete footings remain the most reliable choice for long-term stability, but ground anchors or surface mounting can work beautifully when matched to the right circumstances.
If you’re confident in your DIY skills and have straightforward soil conditions, tackling this project yourself can save hundreds of dollars. But don’t hesitate to call in professionals for challenging situations like rocky terrain, large structures, or when permits are involved. The money spent on expert installation beats the cost of fixing a failed anchoring job.
Take the time to get this foundation right from the start. Your pergola will reward you with years of stable, worry-free outdoor enjoyment.